
If you’re aiming for a proper full-bleed print — where the design runs right to the edge — the last thing you want is unexpected white borders creeping in.
Many people now use Canva to design their own artwork for print. Whether it’s a flyer, poster or business card, there are a few simple steps to make sure your Canva file downloads correctly for printing. Below we’ve given you a step-by-step guide to ensuring your files download just as we need them to, giving you that full bleed finish you’re looking for.
First — What Are Bleed and Crop Marks?
Bleed is just extra space around the edges of your design (3mm is the general guideline) that gets trimmed off when we cut your artwork down to size.
Why does it matter?
Because we use guillotines or specialised cutting machines, there’s always a tiny amount of movement when trimming. Bleed gives us the extra margin needed so white edges don’t appear. If your background stops exactly at the edge, even a 1mm shift can leave a white edge on your final print. Having bleed prevents that.
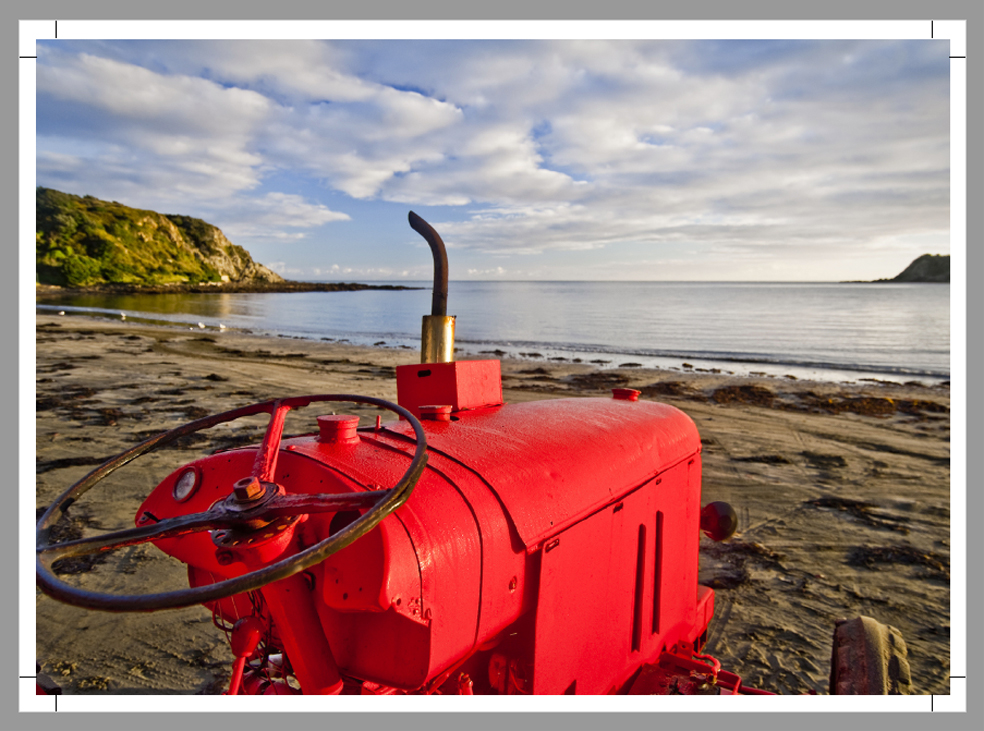
Crop marks are the little lines in the corners of your exported file that show where to cut.
Step 1: Set Up the Right Size From the Start
Before you even think about bleed, you need to start your file with the right dimensions. You can do this by going to custom size and specifying your dimensions (make sure you have the right unit selected! You want mm or cm NOT px which is the default).
If you’re unsure of the most common sizes and their dimensions, you can visit our resource page The Most Common Paper Sizes Used for Printing
Step 2: Turn On Bleed in Canva
This is the bit most people miss.
Inside your design:
- Click File
- Click Settings
- Select Show print bleed
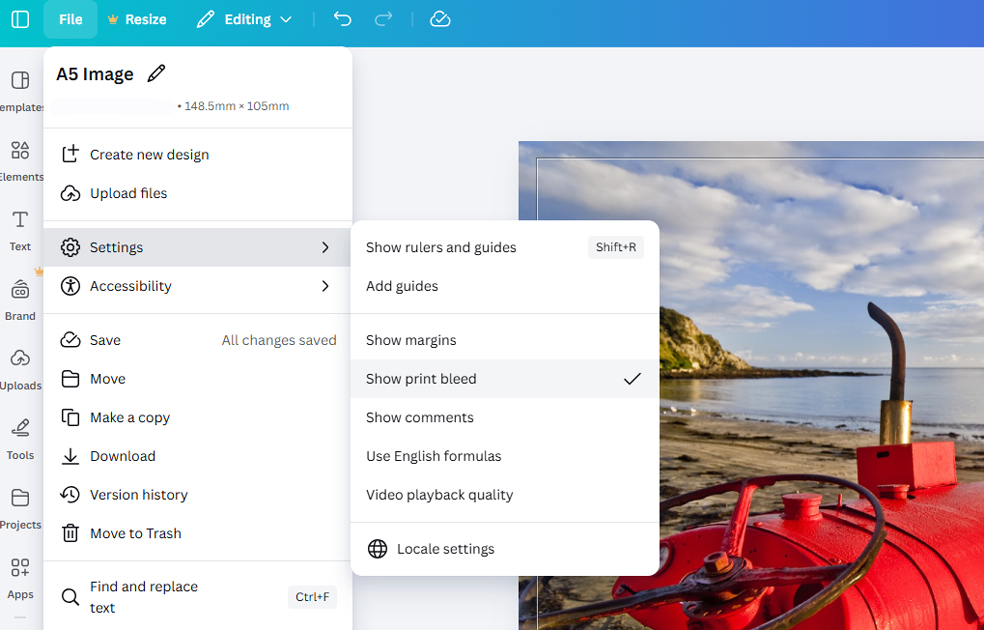
You’ll see a thin border appear around your page.
That outer area? That’s your bleed zone.
Anything that’s meant to go to the edge (background colours, photos, patterns) needs to stretch into that area.
Step 3: Actually Extend Your Design
This is where people think they’ve done it properly… but haven’t.
Simply turning bleed on isn’t enough – your background colours, photos or graphics must actually extend into the bleed area.
If you have:
- A coloured background → drag it slightly past the edge
- A photo touching the border → pull it out into the bleed area
- A full-page graphic → make sure it extends fully
Don’t just line it up neatly with the edge as that’s where we’ll cut. It needs to extend outside that edge.
Also very important:
Keep text and logos away from the edges. Give them breathing room. Printers can shift slightly when trimming and we want to make sure nothing is going to accidentally get cut off. The last thing you want is your contact details chopped in half!
It’s usually good to keep important content/logos at least 5–6mm inside the cutting edge.
Step 4: Download It Properly
When you’re ready to export:
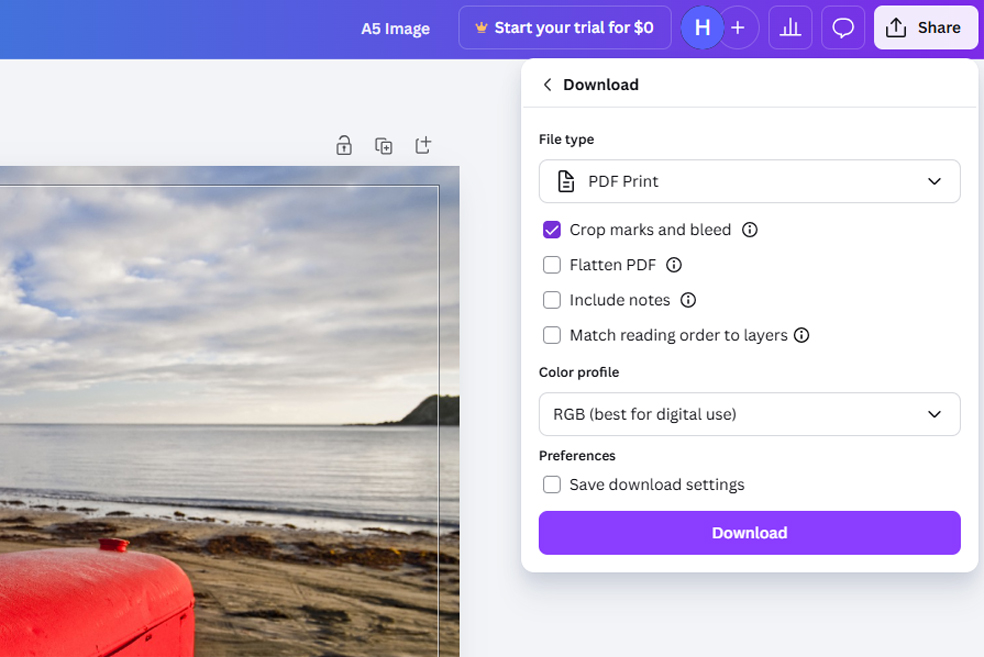
- Click Share
- Click Download
- Choose PDF Print
- Tick the box that says Crop marks and bleed
- Download
That’s it.
Canva will automatically add the bleed and trim marks to your PDF for you to send to us.
NOTE: If you download your file as a JPG you won’t get these options, so make sure you select PDF Print.
When Do You Actually Need Bleed?
You need it for things like:
- Business cards
- Flyers
- Posters
- Brochures
- Invitations
If it’s being physically cut and has a background image/colour that you want all the way out to the edge then you need bleed.
You’ll know you’ve done it right if your downloaded artwork looks like this when you open it:
Canva is a great tool for creating your own designs, and with a couple of small setup steps your files can print perfectly. Setting your file up this way also helps ensure it moves smoothly through our print process without delays.
We hope this helps. If you have any questions, feel free to reach out to us at print@riegers.co.nz